Securing Node-RED with Authentik OIDC: A Complete Guide
Tired of managing separate logins? Learn how to integrate Node-RED with Authentik using OpenID Connect (OIDC) for centralized, single sign-on. This step-by-step guide covers protecting the editor, securing API endpoints, and creating public webhooks for services like Ghost.

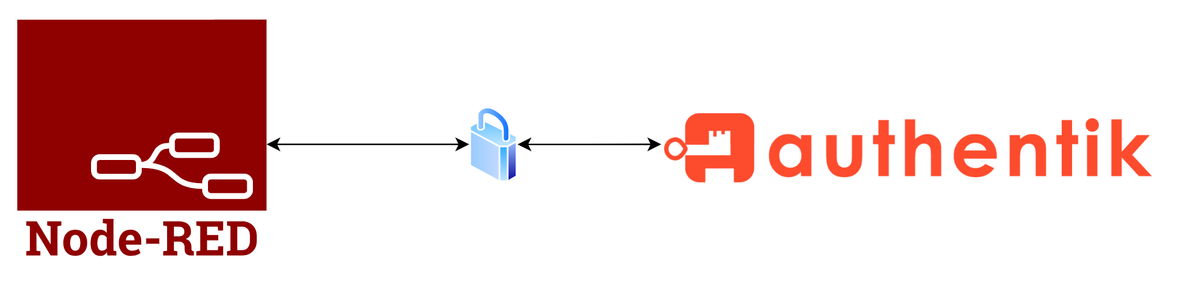
Node-RED is an incredible tool for home automation and prototyping, but its default security model is wide open. Authentik is a powerful, open-source Identity Provider that can centralize authentication for all your self-hosted services. So, why not use them together?
In this guide, we'll walk through the complete process of integrating Node-RED with Authentik using OpenID Connect (OIDC) for Single Sign-On (SSO). We won't just lock down the editor; we'll also secure the HTTP endpoints created in our flows while still allowing for a public, secure webhook—perfect for things like a contact form on a Ghost blog!
This tutorial assumes you have Node-RED and Authentik running, likely via Docker.
The Goal: A Three-Layered Security Model
Our goal is to achieve a professional-grade security setup for Node-RED:
- Protected Editor (
adminAuth): Only users authorized by Authentik can access the Node-RED editor and admin panel. We'll manage permissions centrally in Authentik. - Protected API Endpoints (
httpNodeAuth): By default, all HTTP endpoints created withhttp innodes will require an Authentik login. - Public Webhook Exception: We'll create a specific exception for a public endpoint (e.g.,
/api/public/contact-form) that bypasses user login but is secured with its own API key.
Step 1: Configure Authentik
First, we need to tell Authentik about our Node-RED application and who is allowed to use it.
- Create a Provider: In Authentik, go to Applications -> Providers and create a new OpenID Connect Provider.
- Name:
Node-RED - Client type:
Confidential - Scopes: The default scopes
openid,email, andprofileare perfect. - Save the provider and copy the Client ID and Client Secret.
- Name:
- Create an Application: Go to Applications -> Applications and create a new application.
- Name:
Node-RED - Slug:
node-red(or similar) - Provider: Select the
Node-REDprovider you just created.
- Name:
- Configure Authorization (The Right Way): This is the most important step for security. We will ensure only specific users can access Node-RED.
- In Authentik, create a group (e.g.,
Node-RED Admins) and assign your user account to it. - Go back to your Node-RED Application and select the Policy / Group / User Bindings tab.
- Click Bind Policy, select the default-access-policy, and click Next.
- On the next screen, under Bind to a group, select your
Node-RED Adminsgroup. - Click Submit.
- In Authentik, create a group (e.g.,
Redirect URIs/Origins: This is critical. Add the callback URL for your Node-RED instance. It follows a specific pattern:
https://nodered.yourdomain.com/auth/strategy/callback
Now, only users in the Node-RED Admins group can successfully complete the login flow for this application.
Step 2: Configure Node-RED's settings.js
This is where the magic happens. We need to tell Node-RED how to talk to Authentik. Open your settings.js file to make these changes.
npm install passport passport-openidconnectFirst, require the necessary libraries at the top of the file:
// settings.js
const passport = require("passport");
const OidcStrategy = require("passport-openidconnect").Strategy;
Next, we'll define our OIDC configuration. This keeps our code clean and easy to manage.
// --- OIDC Configuration Section ---

// The verify callback is called after a successful login. Its only job
// is to pass the user's profile along. Authorization is handled by Authentik.
const oidcVerifyCallback = function(issuer, profile, done) {
    return done(null, profile);
};

// The main options for our OIDC strategy
const oidcOptions = {
    issuer: 'https://authentik.yourdomain.com/application/o/node-red/', // <-- Change this!
    authorizationURL: 'https://authentik.yourdomain.com/application/o/authorize/', // <-- Change this!
    tokenURL: 'https://authentik.yourdomain.com/application/o/token/', // <-- Change this!
    userInfoURL: 'https://authentik.yourdomain.com/application/o/userinfo/', // <-- Change this!
    clientID: 'YOUR_CLIENT_ID_FROM_AUTHENTIK', // <-- Change this!
    clientSecret: 'YOUR_CLIENT_SECRET_FROM_AUTHENTIK', // <-- Change this!
    callbackURL: 'https://nodered.yourdomain.com/auth/strategy/callback/', // <-- Change this!
    scope: ['email', 'profile', 'openid'],
    proxy: true
};

// Globally register the strategy so all parts of Node-RED can use it
passport.use('openidconnect', new OidcStrategy(oidcOptions, oidcVerifyCallback));
Finally, find module.exports and configure the three authentication layers.
// --- In module.exports ---
module.exports = {
    // ... other settings ...

    /**
     * Secures the editor and Admin API.
     */
    adminAuth: {
        type: "strategy",
        strategy: {
            name: "openidconnect",
            label: 'Sign in with Authentik',
            icon: "fa-cloud",
            strategy: OidcStrategy,
            options: {
                ...oidcOptions,
                verify: oidcVerifyCallback
            }
        },
        // This function receives a simple identifier (like the 'sub' claim)
        // for an already-authorized user and maps it to a Node-RED user object.
        users: function(identifier) {
            return Promise.resolve({ username: identifier, permissions: "*" });
        }
    },

    /**
     * Secures the HTTP Flow endpoints.
     */
    httpNodeAuth: function(req, res, next) {
        // Define any path starting with this as "public".
        const publicPath = '/api/public/';

        if (req.path.startsWith(publicPath)) {
            // This is our public endpoint. Skip OIDC authentication.
            return next();
        } else {
            // For ALL OTHER paths, enforce the OIDC login.
            return passport.authenticate('openidconnect', { session: false })(req, res, next);
        }
    },

    /**
     * Optional: Secures the httpStatic directory.
     * If you don't use httpStatic, you can leave this commented out.
     */
    // httpStaticAuth: { ... },

    // ... other settings ...
};
Remember to restart Node-RED after saving settings.js!
Step 3: Create a Secure Public Webhook
Now that httpNodeAuth protects our endpoints, our public webhook path (/api/public/*) is open but needs its own security. We'll use a simple secret API key.
- Generate a Secret Key: Create a long, random string. A UUID is a great choice.
- Build the Flow: Create a flow to handle the incoming request.
http inNode:- Method:
POST - URL:
/api/public/contact-form
- Method:
- Connect the 1st output to your main logic (e.g., rate-limiting, sending an email).
- Connect the 2nd output to an
http responsenode to return the 401 error.
function Node (Security Gate): Set this to have 2 outputs.
// Get the required secret key from the environment
const requiredToken = env.get("GHOST_FORM_SECRET");

// Get the key sent from the client in the request header
const receivedToken = msg.req.headers['x-api-key'];

// Check if the received key is missing or doesn't match
if (!receivedToken || receivedToken !== requiredToken) {
    msg.statusCode = 401; // Unauthorized
    return [null, msg]; // Send error to 2nd output
}

// Key is valid, proceed via 1st output
return [msg, null];
Add to Environment: Add this key as an environment variable to your Node-RED Docker container.
# In your docker-compose.yml
environment:
  - GHOST_FORM_SECRET=f4a6b2c8-d1e0-4f3a-8b9c-7d2e1f0a5b6c
Restart Node-RED again.
Step 4: Test Everything!
- Test the Editor: Go to
https://nodered.yourdomain.com. You should be redirected to Authentik to log in. Try logging in with a user who is not in yourNode-RED Adminsgroup; Authentik should block them. - Test a Secure Endpoint: Create a temporary flow with an
http innode at/test-secure. In a private browser window, navigate tohttps://nodered.yourdomain.com/test-secure. You should be forced to log in via Authentik. - Test the Public Webhook: Use a tool like
curlor Postman to send a POST request to/api/public/contact-form. First, try it without theX-API-Keyheader (it should fail with a 401). Then, add the header with your secret key (it should succeed).
You now have a robustly secured Node-RED instance with a clean, centralized login system. No more separate passwords, just seamless SSO.